How can I dye a cotton shirt so the pattern looks like spatters of blood?
Name: Sophie
—ADVERTISEMENTS—
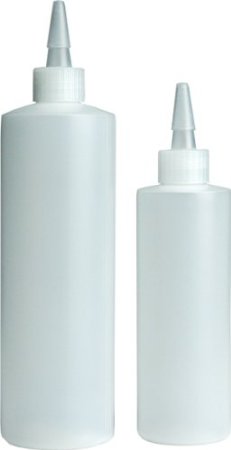
Jacquard 8oz Plastic Application Bottle
ideal for applying dye
Jacquard Soda Ash
Dye Fixer
Soda ash fixes fiber reactive dye permanently in cotton. Does not work for all-purpose dyes such as Rit.
Country or region: USA
Message: Hey, I was wondering how to dye spots onto a cotton shirt. I want to achieve a look of blood spatters, but for it to be permanent. I know for RIT dye and other types you have to soak your cloth, but that wouldn't give me the blood spatters I'd like. So how, if it's possible, could I dye a cotton shirt so the pattern looks like blood spatter?
This project is very doable, given the right materials.
Definitely don't use Rit all-purpose dye, since it will run across the entire shirt. What you want is fiber reactive dye, such as Procion MX dye, applied using plastic squirt bottles. The fiber reactive dye forms a chemical bond with whatever part of the cotton fabric you put it on, so the spots stay put.
Tie-dyeing kits are excellent for this, except that they rarely contain a true red like you need for blood, since magenta mixes brighter colors than a true red can. You might be able to find a decent tie-dyeing kit which has a true red, or you can order the exact color you want from a dye supplier such as PRO Chemical & Dye or Dharma Trading Company, along with a plastic squeeze bottle and soda ash.
Some tie-dyeing kits have soda ash, which is the fixative for this type of dye, mixed into the dye bottles; others have you apply it as a separate presoak. Both will work fine. In the latter case, after presoaking your shirt in soda ash, you can line-dry the shirt, so the soda ash will dry right into the fabric, still ready to act when the dye hits it. For very distinct splatters, a slightly damp shirt is best. One you've just presoaked in soda ash and wrung out is a little too wet, encouraging the drops of dye to spread a bit more than you want.
So here's your method:
1. Order a two-ounce jar of red or brownish red Procion MX dye (try PRO Chemical & Dye's PRO MX 320 Turkey Red or, for more of a dried-blood color, PRO MX 336 Barn Red; alternatively, try Dharma Trading Company's Fiber Reactive Procion PR136 Oxblood Red, or, if you have an exceptionally good art and craft supply store, look for Jacquard Products Procion MX 032 Carmine Red. All of these are the exact same type of dye, but, because they are mixed a little differently, are slightly different shades of red.
Also order plastic bottles, the squeeze bottles with the pointed "yorker" tops. You'll need only one for this project, but you should probably get a couple more while you're at it for the next one.
You will also need soda ash (sodium carbonate), which is conveniently ordered with your dye, and, optionally, you can also order urea, which helps to keep the dyes moist overnight while they react with your fabric.
2. Pre-wash your shirt in the hottest water it can tolerant, to remove any stains. The shirt should be 100% cotton or another easily dyeable fiber, such as bamboo rayon or 100% silk. Do not attempt this project with a shirt that contains, say, 50% polyester, because that would turn your red to a pink, which would not be at all blood-like.
3. Dissolve half a cup of soda ash in half a gallon of warm water (or 125 ml per two liters), then soak your shirt in it for twenty minutes or more. Wearing waterproof gloves (to avoid irritation from the soda ash), squeeze out excess water and then hang your shirt up to dry. If you use a clothes hanger for this step, it should be made of plastic, to avoid rust stains.
4. Dissolve your dye. Start by putting about one tablespoon of water into the bottom of your mixing cup or bottle, then add your dye powder and stir together to form a paste, crushing any lumps with the back of your spoon. Red is a very intense color--if you don't use enough, you'll get pink instead--so use about four teaspoons (20 ml) of dye powder. After you've mixed the dye to form a paste, add the rest of the water, to a total of one cup. I like to include one tablespoon of urea per cup of dye mixture. If your water is hard, also add some water softener (you can ask me about this separately), or use distilled water instead of tap water. The dissolved dye should be much darker in color than your final results will be.
5. After it is completely dissolved, pour the dye into your squirt bottle, wipe any spilled dye off the neck of the bottle, and put the yorker bottle top on tightly.
6. Lay your dry or mostly-dry soda-ash-soaked shirt out flat on your work surface (this could be the lawn, inside a very large plastic bin, or on layers of paper towels on top of a plastic tablecloth). Also lay out a rag for testing on, and drip dye onto your rag to see how to make the sort of blood drops you want. Once you have it right, which shouldn't take long, drip your drops onto the soda-ash-soaked shirt. (Beware that sometimes a drop of dye will shoot out at an unexpected angle, so don't do this right next to unprotected furniture or walls.)
7. Leave the shirt in a warm place to react overnight. It should be kept moist during this time, either by having included urea in the dye mixture, or by covering the shirt with plastic now; the dye reaction stops once the shirt completely dries out, but it never completely dries if you used urea.
8. The next day (or the day after that if it's more convenient for you), rinse the shirt with cool water (I like to pop it into a washing machine full of cold water for one wash cycle, or you can do it by hand), and then wash it two or three times in the hottest water you can, ideally over 140°F (that's 60°C). You have to use very hot water to most efficiently remove the unattached excess dye. Do not use detergent in the first cool wash, unless your detergent is Synthrapol (a special dyer's detergent); after that initial washing, you can use whatever laundry detergent you normally use. The temperature of the water is what removes the excess dye, not what detergent you choose.
Using this procedure will give you blood-like spots that will last for a very long time. After completing the hot washing as described above, your clothes will be safe to wash with any other color at any temperature, because properly-fixed Procion dyes are remarkably washproof. Unlike all-purpose dyes, they will not bleed in the laundry.
(Please help support this web site. Thank you.)
(Please help support this web site. Thank you.)
Posted: Wednesday - July 24, 2013 at 09:16 AM
Follow this blog on twitter here.
Quick Links
- All About Dyes & Dyeing Top -
- Top of this blog -
- FAQ -
- The Dye Forum -
- How to Tie Dye - How to Batik -
- Books - Toys - Plants -
- Top of this blog -
- FAQ -
- The Dye Forum -
- How to Tie Dye - How to Batik -
- Books - Toys - Plants -
More in this category:
- -
Statistics
Total entries in this blog:
Total entries in this category:
Published On: Jul 24, 2013 09:58 AM
Total entries in this category:
Published On: Jul 24, 2013 09:58 AM